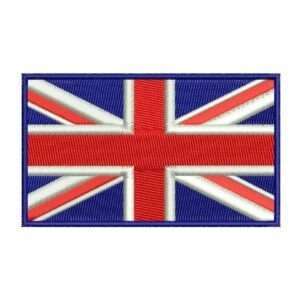
As you are determined that you are going to start machine embroidery but you don’t have any experience in this sector, you might get frustrated and in the beginning, you might mess up in designing but that shouldn’t stop you from going. Because in the long run there are some tricks and tips that can help you in digitizing machine embroidery.
In this article, we will share with you should do and what you should not do for digitizing with a machine for embroidery. Let’s get started.
Do Not Rely on Auto Digitizing
Yes, you heard it right. Because it can turn your work into a fully disaster and it’s because the software can brag about its digitizing ability but the computers aren’t smart enough and this process takes some decisions that are against your expectations as like what to choose and what design to make.
Just think, with a blue background, your subject is wearing a blue shirt, and it may interpret the overall design and look as the subject is having the same stitch angle and thread color. But humans are smart, and that’s why we can shape the design in a way that looks appealing to the audience’s eyes so that we are able to assign the right thread colors, stitch angles and stitch types.

On Simple Things You Can Do Auto-Digitizing to Save Time
That being said, Auto Digitizing does save your time, and in fact, it can be a huge time saver for you if you have a lot of work to do, that’s why auto digitize is best if you have multiple cut-outs to work with. Your work can pace up if you know where to use the auto-digitize and where not to, so it is crucial to keep in mind is to use this feature appropriately or it can ruin your design.
Play with Your Stitch Angle
In general, the program likes to stitch at a 45-degree angle. You don’t have to rely on your design as it might look eerie and one-dimensional. To make an interesting look at the design having a greater contrast between the elements, you need to play with the stitch angles of different shapes.
Alongside that, the thread direction also plays a major role in your embroidery digitizing design and it won’t cause many issues when stitching. It is good to play with the stitches and angles as if you are going in one way, it will take your fabric in that way.
Incorporate with the Underlay Stitch
Underlay stitch is done before the main stitching process begins. It is a very low-density preliminary shape. You can use underlay in most of the embroidery software. Underlay stitching has its uses. For instance, it helps to tamp down the fibres when you are stitching an embroidery design having a nappy fabric.
Moreover, underlay stitching helps to secure a fabric design from pulling and puckering when stitching on a large shape. The benefit of this is when your underlay stitch goes well then the chances of getting a great outcome are higher.
Outlining
Outlining helps to create a more defined border on the shape when doing a filled area. You can make a triple stitch that makes a running stitch and overlaps it three times. Depending on the software, you can use this tool. The only caveat is the stitch length. If it is too long then it can’t follow the shape outline. You can choose the shape size depending upon the design.
You can duplicate the shape to have an outline and a fill. You can do it easily as one is the copy of the other.
Digitize Elements from Back to Front
You need to make a strategy before you start to make an embroidery design. A good practice is to start digitizing shape that is the farthest from the background. Fill the stitches first then the outlines of the shape. It is not a good way to fill the stitches first then go for another shape and then running back to the first shape outline. If you are using a single-needle machine, it would be useless as you will need an unnecessary thread colour change.
Decrease the Jump Stitches
Yes, it is vital to minimize the jump stitches. Some embroidery machines trim the jump stitches while others don’t. Jump stitches help to pull the design and span on large areas. It is a good practice to digitize the design and decrease the jump the stitches as much as you can.
Keep the Satin Stitches Narrow
When you are digitizing design for machine embroidery you need to know whether you want to make a step stitch or a satin stitch or other. It is because satin stitch comes handy in some cases while in others it doesn’t. For instance, if you choose a satin stitch for a wider shape fill, you might end up having long loose stitches that can be snagged. On the other hand, if you use it on a narrow shape like a letter, the satin stitch will span the entire width.
These are some dos and don’ts for machine embroidery. Follow these tips and tricks and you will be able to make some amazing designs for embroidery with the machine. If you still have any questions about the topic, you can reach out to us. Our customer service team will be happy to assist you. Embroidery
Share this:
- Click to share on X (Opens in new window) X
- Click to share on LinkedIn (Opens in new window) LinkedIn
- Click to share on Tumblr (Opens in new window) Tumblr
- Click to share on Facebook (Opens in new window) Facebook
- Click to share on Pinterest (Opens in new window) Pinterest
- Click to share on WhatsApp (Opens in new window) WhatsApp
- Click to share on Reddit (Opens in new window) Reddit

