

Satin Stitch is an important stitch in embroidery digitizing which is widely used for embroidery technique worked in close, parallel rows. Basically, this stitch used to fill in part of a design. The word satin stitch has been taking from its similarity to the shiny appearance of Satin cloth. It is worked by carrying the thread across the space to be filled and returning under the material next to the stitch just made. The operation is recurrent until the area is filled in. The stitches may be worked in any administration and they may differ in size, for example, when feeling mass leaf form. The efficiency in creating a the stitch is to create the stitches lie remain evenly and closely together and to retain a neat edge to the shape being filled. The other name for the satin stitch is damask stitches.
The importance of Satin Stitch.
Satin stitch is a very easy policy. The difficulties of this stitch are to carry on the neatness, basically when the edge of the pattern is being filled. When you performing you have to make sure the stitches are not pulled so strictly as it wraps the fabric. Holding it so loose will flag the stitch. To avoid the two conditions, it will be wise to use an embroidery hoop in order to hold the fabric tight. The stitch will be smothered to do when the fabric is pulled. Another thing is to keep in mind that this stitch is not kept too long. If our shape happens to be big, we can divide it into smaller sections and each section can be filled with shorter satin stitch.
How to Work Satin Stitch in Wilcom Embroidery studio?
To apply this stitch we have to follow the following step:
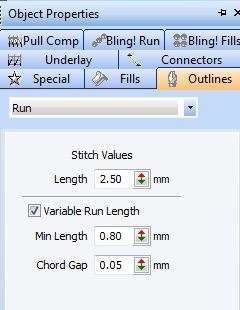
1) Right-click for settings

2) Use outline stitch
3) Use fill up stitch type.
In wilcom embroidery software, the auto spacing advantage is go-round on by default. Maximum times, this option avoid cord breaks and makes visually appealing columns of satin stitches
When a column is too wide, the stitches cannot cover the fabric properly. Contrarily, in very thin columns, stitch density may be too high and needle punching damages the fabric. So we need to adjust stitch density by setting a fixed spacing.
How to apply Satin stitch with auto spacing?
1.To apply the stitch with auto spacing at first we have selected the digitizing method that we want such as column C.
2. And then we have select satin and make an embroidery object. On the other hand, we have to need to select an existing embroidery object and click satin.
3. For object properties, right-click the satin icon and then select auto spacing, adjust density percentage.
4. Tick the auto spacing option if you don’t already check.
5.Adjust Satin density
6.At last press enter or click apply.