

Pull compensation is the coordination shaped to compensate for the unavoidable pulling in, or curving, of your design which arrived when the stitch out. It is just one of the procedures you need to consider if you want your design to have a professional finish. Looking for the best quality digitizing service feel free to contact us.
What is pull compensation?
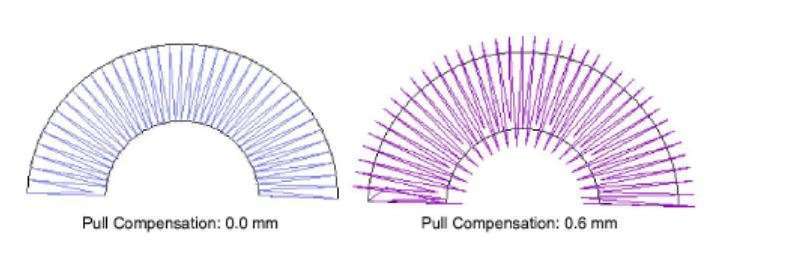
Pull compensation enlarge or minimize the length of stitching in a portion to compensate for the tendency of the fabric to pull together when embroidery is sewn over the top of it. The quantity of pull compensation necessary is dependent on the kind of fabric sewing on; very hard fabrics require little or no pull compensation, while slack fabrics need more compensation.
It is developed as a percentage of the real stitch length. Example: – if we adjust the pull compensation to 120%, the stitches will be enlarging 20% longer than no pull compensation set. There is permanently some pull on your fabric as the hoop moves and the stitches are formed. The curving always happened in the direction of the angle of the stitches. This can result in a hole in your stitches out and outline not where they should be.
The quantity of pulling in depends on a number of causes including:
- The type of fabric we are using. Extension fabrics and softly knitted fabrics pull in more than steadily knitted fabrics.
- The way of stabilizer that we have applied. We must use an iron-on or viscous stabilizer with expansion fabrics.
- The long type of satin stitches pull is more than short stitches.
- The fabric must be beset steadily.
- The type of underlay stitching has been using. Underlay must be applied to larges greatest areas where possible the underlay should run in the other areas.
Why we need to know about pull compensation?
As an embroider we have to keep an aim for the best possible end result. There are many ways that can have an impact on how our embroidery ends up when it arrives at our machine. You have talked about choosing the right needles, fabrics. We embroider on fabrics, which all have a natural spread.
There are always be some pull on our fabrics as the hoop moves back and aloud the stitches are made. This causes movement and disparity. The pulling depends on a number factor-like fabric we are using and how well we circle this, the type of stabilizer that we applied, the size of our design, type of fill stitch, or underlay stitching that we are using. All of these together facts the effect of our embroidery.
By embroidery application, stitches tugging the fabric in with the way of the stitches. It can result in a Vacuum in our stitch out. During the digitizing, we need to judge the natural pull effect and compensate for this, which means we need to add the stitch length of the expected pull.
The digitizer who is an expert on this field can manually fill for pull by overlapping objects of the digitizing. Our test stitch-out will publish any areas which would advantage from tuning the pull compensation. When we do a test stitch-out and we observe that there is too much pulling on the fabric, we will need to adjust our software setting to compensate for the pulling.
How to apply automatic pull compensation?
To apply pull compensation you have to follow the bellowing step:
- Click on the pull compensation button.
- Right-click the pull compensation icon in order to change the current setting.
- Select pull compensation and enter over stitch allowance.
| Fabric | Pull compensation (mm) |
| Cotton | 0.20 |
| T-shirt | 0.35 |
| fleece, jumper | 0.40 |
| Lettering | 0.2-0.3 |